Showing posts with label sweet. Show all posts

Tuesday, 16 August 2011

Zucchini (aka courgette) and carrot muffins

I finally get to add a recipe to the Z section of my recipe index. Woohoo!!

This is not a recipe with a back story, more's the pity. This is one of those google-and-tweak jobs that you do when you have a boatload of something-or-other and need a recipe to use it up.

Oven temperature
180C

Ingredients
175ml vegetable oil
2 eggs
175ml sugar
125ml dark brown sugar
5ml vanilla extract
500ml plain flour
2.5ml baking powder
2.5ml bicarbonate of soda
Pinch salt
10ml cinnamon (or you might prefer ground cardamom seeds)
375ml grated raw zucchini (skin and all)
125ml grated carrot
125ml chopped pecan nuts (optional)

Method
  • Pop about 12 cupcake cases into muffin trays, or grease up muffin trays for about a dozen muffins.
  • Beat the oil and sugars well.
  • Add eggs and vanilla and beat some more.
  • Sift together the dry (powdered) ingredients into a separate bowl and then stir into the wet ingredients.
  • Stir in the veg and nuts.
  • Divide between the muffin cups/cupcake cases. These should be about 3/4 full to allow space to rise.
  • You might like to sprinkle the top with more cinnamon (or cardamom).
  • Bake for about 20 minutes until done (test with a skewer).

Wednesday, 10 August 2011

Carrot, beetroot and banana cake


You may already know that it is possible to use beetroot (beets, to you Americans) in cakes. Or you may think I have wigged out. But I haven't. Honest. Try it.

I mentioned recently that I had found some beetroots on the marked-down-for-quick-clearance shelf at my local supermarket. Well, on that same day, I also found some past-their-best carrots and a bag of totally over-ripe, bruised bananas.

Please don't ever throw your over-ripe bananas out. I know how it goes: you have a family of banana-lovers, and you buy a large bunch because they're on a special. Then, just that week, the kids decide they're not in the mood for bananas and your spouse goes out of town on business. So they begin to look a little unsightly.

I don't enjoy the taste of over-ripe bananas on their own like that, but in this state, they are at their best for use in baking or smoothies, because the flavour is strong and sweet. So bake a banana loaf, or make up some smoothies. Both these things can be frozen.

Just as an added extra to today's recipe (and I will get to it, I promise), here's a smoothie I used to give my kids when they were little and feeling unwell enough to be off their food (all quantities are 'some'):
banana
honey
plain yoghurt
vanilla ice cream (just a smidge)
raw porridge oats

Just zhoozh that lot up together in the blender and serve with ice and a curly straw.

Anyhoo, back to what I did with the rest of the beetroots and the other things I found that day:

Oven temperature
180 (you might have to reduce this - see method below)

Ingredients
250ml sugar
250ml oil
3 eggs
375ml plain (cake) flour
7.5ml baking powder
7.5ml bicarbonate of soda
10ml ground cinnamon
250ml grated carrot (about one 5"/12cm carrot)
250ml mashed banana (about 3 smallish bananas)
250ml grated, raw beetroot

Icing
250ml icing sugar
'Some' cream cheese
Little lemon juice
Little water, if necessary

Method
  • Cream sugar, oil and eggs well.
  • Sift flour, baking powder, bicarb and cinnamon together and add to the creamed mixture.
  • Add remaining ingredients. Blend well together.
  • Pour into a deep cake pan and bake for about an hour. Check from time to time with a skewer. I found this baked really slowly, and the top started to burn a little, so I lowered the oven temperature and covered the cake with foil.
  • Allow to cool on a rack. Don't ice it until it has cooled down completely.
Icing
  • Mix a little icing sugar with the cream cheese until creamed.
  • Keep adding icing sugar and mixing in.
  • Add a little lemon juice for bite.
  • If it gets too stiff, add just a tiny bit of water.
  • Spread over the cooled cake.
Just so you know, this cake lasted less than an afternoon in my household! Oh, and that saucer (in the photo) is one of only two left from my late grandmother's tea service. I am very fond of it.

Wednesday, 20 July 2011

Lemon and poppy seed cupcakes


My boss's husband is a keen gardener, and he has been collecting up the seeds from the many poppies in his garden, ready for next year's crop. I decided to put some of them to culinary use. I genuinely had every single ingredient in the cupboard, so I was able to make these without spending any... what's that stuff called again?

Every second person you speak to has a recipe for these, it seems. This is the one I used. I reckon (predictably enough) that they'd be even better with lime!

Oven temperature
180C

Ingredients
Cupcakes
275g caster sugar
200g butter, left at room temperature for a couple of hours to soften
540ml self raising flour
4 eggs, separated
Juice and grated zest of 3 small lemons
2.5ml vanilla extract
Poppy seeds (some)
Cupcake cases (about 18ish)

Icing
250ml icing sugar
Juice and grated zest of 1 lemon
Little water

Method
  • Cream the butter and sugar together until light and fluffy.
  • Beat in the egg yolks, one at a time.
  • Sift in the flour and mix well.
  • Add lemon juice, lemon zest, about 10ml of poppy seeds and vanilla and beat some more.
  • Beat the egg whites in a separate bowl with clean blades and then fold into the main mixture.
  • Place your cupcake cases into muffin pans and spoon in the mixture. The cases should be about 3/4 full.
  • Bake for about 20-25 minutes until done (test one or two with a skewer).
  • Cool in the muffin pan for a little while before placing them on a cooling rack.
  • Ice as follows: mix together the lemon juice, zest and icing sugar. If it is a little stiff, add just a bit of water.
  • Plop a dollop on top of each cooled cupcake and then sprinkle with some of the poppy seeds.

Friday, 8 July 2011

Lime drizzle cupcakes


I recently made these for my neighbours' 58th wedding anniversary. I promise to make something far more splendiferous for their diamond anniversary in a couple of years' time.

Oven temperature
180C

Ingredients
100g butter, kept in a warm place for a couple of hours to soften it slightly
125ml caster sugar
1 large egg, separated
5ml vanilla extract
175ml plain flour, sifted
10ml finely grated lime zest (or you could use lemon)
5ml baking powder
60ml milk
juice of half a lime

Icing
25ml lime juice
60ml icing sugar

Method
  • Cream the butter and sugar together until light and fluffy.
  • Whisk in the egg yolk and vanilla.
  • Add the sifted flour, zest and baking powder and beat until it is all blended together.
  • Add the milk and beat a little before adding the lime juice and beating a bit more for good measure.
  • In a separate bowl (with clean blades) whisk the egg white until it forms peaks.
  • Fold egg-whites into the rest of the mixture.
  • Grease your cupcake pan, or pop a paper cupcake case into each hollow.
  • Divide the mixture among about 8-10 cupcake spaces and spread it evenly.
  • Bake for about 20-30 minutes or until a skewer comes out clean.
  • Cool in the baking tin for a few minutes, then remove and place in a huddle on a flat plate. Poke a few holes in their tops
  • Whisk the juice and icing sugar together, then drizzle over the cupcakes.
  • Pop the cupcakes onto a cooling rack until cooled. 

Wednesday, 6 July 2011

Cardamom babka


This is a variation on Tessa Kiros's recipe for 'Bobba's babka' from her book Falling Cloudberries. Kiros is one of my favourite favourites. She has a mixed heritage, has lived in various parts of the world, and loves preparing food for people. What a brilliant combination!

Her beautifully presented books are what inspired me to attach a little back story to each of my recipes on this blog. You can curl up and read them even if you're not in the mood for cooking that day... mind you, chances are that you soon will be.

This recipe is quite time consuming, but there are long periods when you can get on with other things while it looks after itself in a warm place.

I made this on Saturday to take to church on Sunday, but it didn't quite work out as planned, due to a rookie mistake on my part. Does it serve to encourage you to learn that I also make rookie mistakes, or does it cause you to lose confidence in my recipes? I'm going to take a chance. I shall reveal the rookie mistake at the appropriate moment.

I used a bread maker to mix up the dough, because yeast is my nemesis. Before I got my bread maker, I never produced a successful yeast-including product. Since I got my bread maker, I have never failed to produce a successful yeast-including product. Simple as.

I am going to share the recipe as per the original (non-bread maker) instructions, and then explain what I did differently.

Oven temperature
180C (adjust for fan assisted ovens)

Ingredients
625g plain (cake) flour
5ml salt
80ml caster sugar
15g dried yeast
250ml tepid milk
60ml vegetable oil (plus a little extra for brushing)
2 large eggs, lightly beaten

15ml ground cardamom (Kiros calls for cinnamon)
100g dark brown sugar
60g butter, softened

1 egg yolk
10ml milk
30g soft brown sugar

Method
  • In a large bowl, mix together the flour, salt.
  • In a smaller bowl, mix together the yeast, milk and oil and leave for 10 minutes to let the yeast  start to do it's thang.
  • Scrape out the yeast mixture into the larger bowl (make sure you get it all - it tends to be reluctant) and mix well.
  • Add the eggs and mix some more.
  • Tip it out onto a floured surface and knead it well for about ten minutes.
OR... bung all the above ingredients into a bread maker and set it to 'dough' then proceed as below.
  • Brush the top with oil and pop it oily side down into a large, clean bowl. Brush the surface that is now on top with oil, too.
  • Cover with cling film (Saran wrap) and leave in a warm place for about an hour and a half to rise... and it will rise. It should now be about twice the size it was.
  • Split the dough in half and roll out one half on a floured surface. You need to get it about .5cm thick. It should preferably be a roughly rectangular shape of about 25x45cm, but don't panic if the shape isn't perfect.
  • Mix the cardamom with the butter and brown sugar and spread half of this over the rolled dough. Spread it well and evenly.
  • Roll the dough into a sausage along its longest edge and set aside, while you repeat this process with the rest of the dough.
  • Now lay the two sausages side by side and sort of twist/braid them together. Pinch the ends together well. When you've entwined them, give them a few extra twists, to tighten up the loaf.
  • Pop them into a greased 30cm loaf tin (and this is where my rookie mistake came in. I forgot to grease the loaf tin. I mean... really???) and leave in a warm place for another hour or so, to rise some more.
  • Mix together the egg yolk and milk and brush the top of the loaf. Sprinkle with brown sugar.
  • Bake for about 30-40 minutes, or until a skewer comes out clean when you poke it right in the middle.
  • If the ends are cooking too quickly, and the middle too slowly, Kiros recommends you cover the ends of the loaf with foil.
  • Cool for a few minutes in the tin before turning out onto a cooling rack. For those of us who have made rookie mistakes, this is the moment when half the loaf empties out and the other half stays behind in the tin. It tastes, just as good, mind... it just doesn't look good enough to serve to guests.
  • Serve slightly warm or totally cooled (if it lasts that long) with or without butter.

Wednesday, 29 June 2011

Ginger beer


I really enjoy ginger beer, but the stuff that is sold commercially under that name is hardly worth drinking. However, I have a recipe (you might have guessed) that you might like to try.

It comes out of a a delightful little book that was put together in aid of Hospice in South Africa many years ago. It contains a collection of recipes from South African 'celebrities' (I use quotes because I'm not sure that the MPs included in the book should be given that label). I will be sharing other recipes from the book at some point, I'm sure, having recently rediscovered it hidden between two larger books on my recipe bookshelf (aka the windowsill in the conservatory).

I would like to explain why I purchased the book, if you don't mind:

During my Gran's agony-ridden final days, the Hospice people were a great comfort and help to us, visiting three times a day with the blessed syringe-borne relief for my Gran. Two of the workers even attended her funeral. They had not had the enormous privilege of knowing my Gran as a whole person in possession of a sound mind and a gentle heart, but they came anyway. And I'm glad they did, because they got a glimpse into the sort of a woman my Gran had been before the cancerous scourge had robbed her of her dignity, her graciousness and her humility.

Okay, now that I have utterly ruined my mascara, let me get back to the recipe for ginger beer, which - I should probably mention - takes about 10 days, and you will need a fair few 2l bottles, so get collecting.

According to the book, this recipe is a firm favourite of Nelson Mandela, but since this claim is made by a fictitious alter ego of a female impersonator, who allegedly made it for him, I'd take it with a pinch of salt, if I were you!

Ingredients
Stage 1
10ml yeast
80ml sugar
80ml grated ginger root (or you can use ground ginger, if you like)
500ml water

Stage 2
1,250ml sugar
2l (2,000ml) hot water
4l (4,000ml) cold water
200ml lemon juice

Method
Stage 1
  • Place the water in a jug or bowl and stir in the yeast, 10ml sugar and 10ml ginger.
  • Leave overnight.
  • Each day, for seven days, stir in another 10ml sugar and 10ml ginger.
Stage 2
  • Dissolve sugar in the hot water.
  • Add the cold water and lemon juice.
  • Strain the stage 1 mixture through a muslin and add it to the above.
  • Bottle and allow to stand for 1-2 days at room temperature. It's probably a good idea to leave a bit of space at the top of the bottles... just in case! And screw those caps on well.
  • Refrigerate and enjoy with ice and a sprig of mint or a slice of lime.

Tuesday, 28 June 2011

Cardamom loaf cake

Years ago, I wouldn't have known what to do with cardamom (and please note that it is cardamom, not cardamon) if my life had depended on it. The first time I encountered it, my sister-in-law had bunged a pod in with some coffee that was percolating. It was thoroughly delicious! I also discovered that it was sometimes used in curries. So I bought some and used it occasionally to flavour coffee and curries.

Then, oh glorious then, we went on our first family trip to Sweden. The Swedes have this very civilised observance called elvakaffe - eleven (o' clock) coffee, which equates to the English elevenses. And of course, with the coffee, there must be a little something. And that little something had quite often been baked with cardamom. Where the recipes to which I was accustomed used cinnamon, the Swedes used cardamom instead, it seemed. Perhaps it was the novelty, but I decided then and there that cardamom was the superior flavour.

This recipe is a sort of amalgam of various cardamom loaf recipes I have acquired along the way. I always buy the spice in pod form and then grind it using a coffee grinder. It's a bit of a faff, but it's well worth it for the way it involves your nose in the flavour sensation.

Oven temperature
180C

Mix well...
Ingredients
125g butter
375ml caster sugar
3 eggs, separated
7.5ml ground cardamom seeds
1000ml self raising flour
5ml baking powder
Pinch salt
250ml water
60ml oil (I like it with olive oil, but you should experiment)
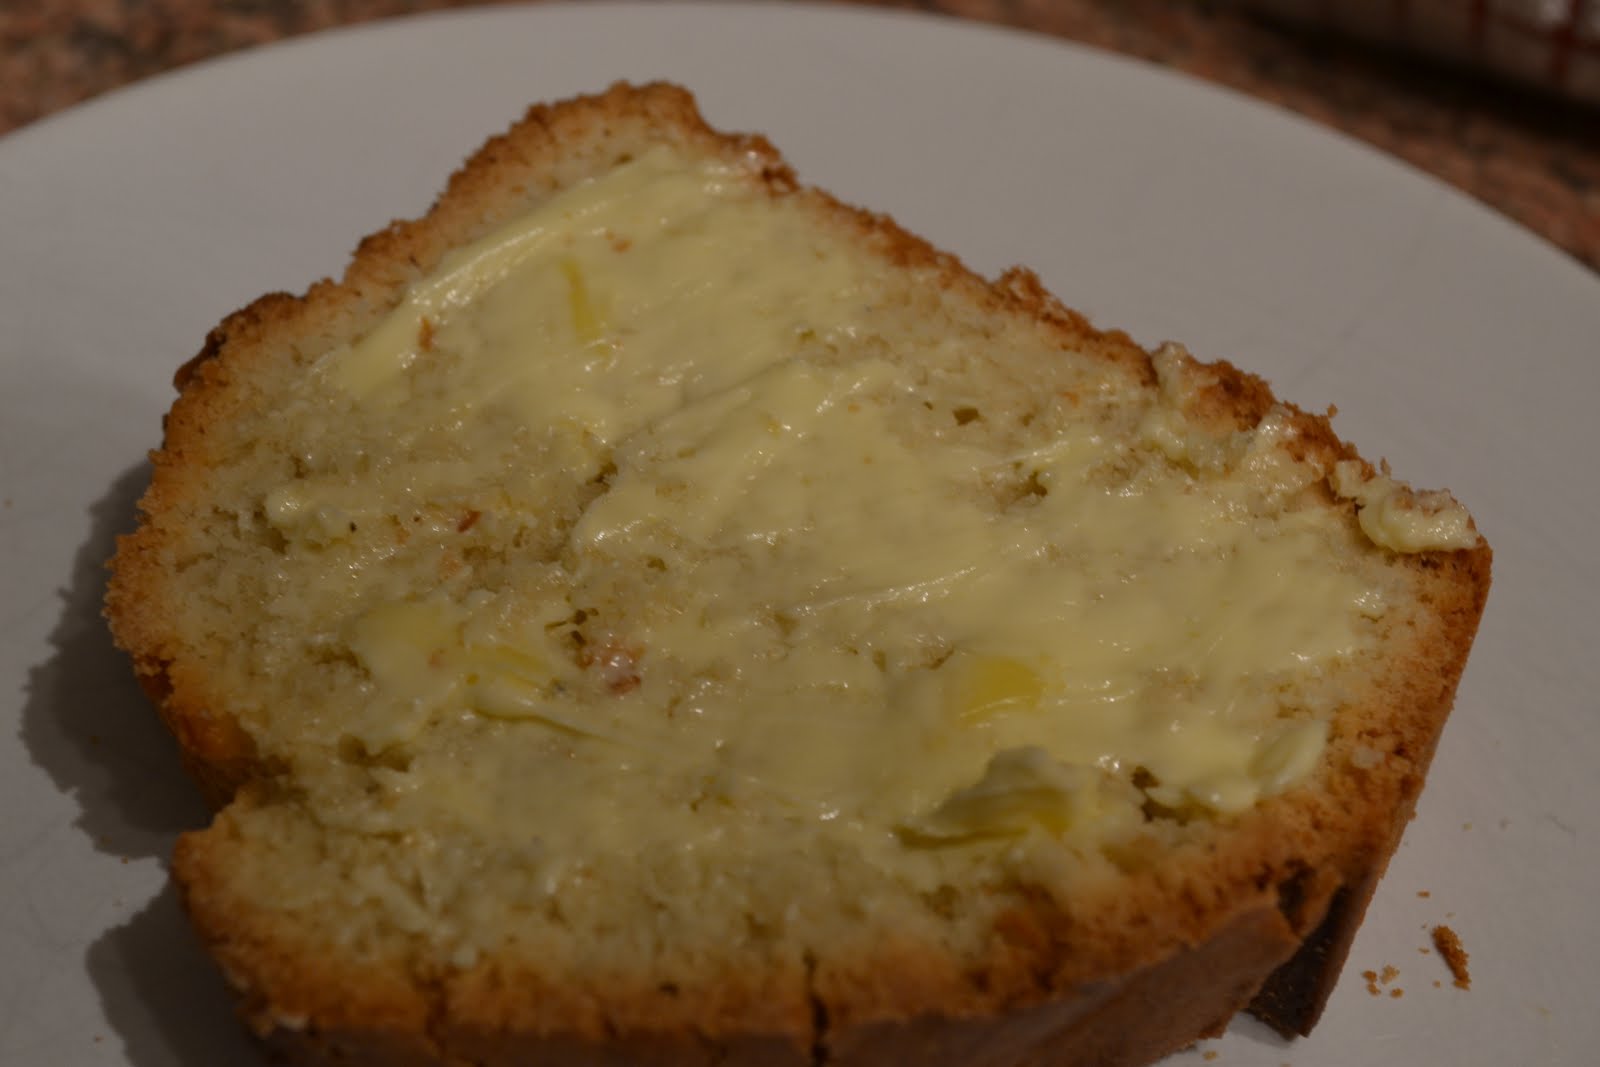
Slice and eat with butter

Method
  • Cream together the butter and sugar.
  • Stir in yolks and cardamom.
  • Add flour, salt, baking powder and water.
  • Beat egg whites until stiff and then fold into mixture.
  • Add oil and mix well.
  • Bake in a greased loaf tin for about an hour.
  • Cover with a cloth and allow it to cool in the tin for about 20 minutes before turning it out onto a cooling rack.
  • Slice up and eat with (or without) butter.

Wednesday, 22 June 2011

Pecan blondies


You've heard of brownies, right? Not the little girls who go on to become girl guides, but the chocolate tea time treats. Well, blondies are just brownies made with white chocolate. Try these for a tasty alternative.

Oven temperature
180C

Ingredients
125g butter
200g white chocolate or 100g white chocolate and 100g (white or other) choc chips
2 eggs
125ml sugar
2.5ml vanilla extract (or cardamom extract if you happen to have it)
250g cake/plain flour
Pinch salt (even I use a generous pinch, and you know I have a light hand when it comes to salt)
50g pecan (or other) nuts, chopped

Method
  • Chop the slab chocolate into smallish pieces. If you're using chips, these obviously don't need chopping.
  • I always cool things upside down
  • Line a square cake tin with baking parchment. If you find it tricky to line the sides, then just line the bottom, but grease the sides well.
  • Use a double boiler or, if you don't have (and I don't), a Pyrex dish over a saucepan. Bring water to the boil in the bottom half and melt 100g of the chocolate in the top, stirring frequently.
  • Add the butter and stir until it has completely melted and blended with the chocolate.
  • Removed from heat and set aside for now.
  • Cream together the eggs and sugar until light and fluffy, then add the vanilla.
  • Beat the chocolate mixture in to the egg mixture.
  • Sift in the flour and salt and beat well.
  • Stir in the nuts and remaining chocolate (or choc chips).
  • Pour into the cake tin, smooth over with a spatula and bake for about 15-20 minutes.
  • Remove from the oven and leave to stand for about 20 minutes.
  • Cut into squares in the pan, and remove carefully with an egg lifter (aka 'fish slice' in the UK) to place on a cooling rack.
  • Wait until they have completely cooled and, if you have any left (I didn't!), you can pop them into an airtight container.
Notes
  • You could choose to top them with icing or (even better) with fudge icing as chocolate fudge brownies, but they are very sweet already, so try them as is, first.
  • Try a few variations: 100g white chocolate with 100g plain (dark) chocolate chips, for example.
  • Try using different nuts. I reckon pistachios would be the business!

Friday, 17 June 2011

Rock biscuits

This is one of those recipes that 'takes me back' as they say. Rock biscuits and rock buns were very popular when I was in my yoof, but one seldom hears about them these days.

So I recently took a little wander down memory lane and this is the route I took.

Oven temperature
200C

Ingredients
250g butter
250ml sugar
500ml plain (cake) flour
15ml baking powder
2.5ml ground cinnamon (or try cardamom for variety)
Pinch salt
250ml seedless raisins
125ml pecans, chopped

Method
Place on a cooling rack
  • Cream the butter and sugar together until light and fluffy.
  • Beat the eggs and then whisk into the butter mixture.
  • Sift the dry ingredients into the egg mixture and beat well.
  • Add the raisins and nuts and mix through (better to use a wooden spoon, now).
  • Drop dollops of the mixture onto a greased baking sheet, or onto a piece of baking parchment on a baking sheet (I prefer the latter).
  • Bake for 10-15 minutes until they're going golden.
  • Place on a cooling rack until cool. Don't put them into a tin before they're completely cool or they will go soggy.
You should get about 45-50 biscuits from this recipe.

Monday, 13 June 2011

Themed children's parties: mice


Today is the last post drawn from this picture, you'll be pleased to hear. We're looking at the little mice on the left.

Ingredients
Thin, round biscuits such as arrowroot or Marie biscuits
White marshmallows - one per biscuit
Pink marshmallows - two or three should do the trick
Liquorice laces
Red food colouring and a cotton bud (q-tip) to apply it with
A little icing sugar mixed with just enough water to make a paste

Method
Marshmallow on each biscuit
Add a tail
  • Using a dab of the icing paste, place one white marshmallow on each biscuit like so.
  • Cut the laces into lengths for tails and stick one end of each lace into one end of each marshmallow to serve as a tail. Save some liquorice for later.
  • Cut the pink marshmallows into slices and then cut each slice in half.
  • Using a dab of icing paste, secure two of these semi-circles onto the white marshmallow to serve as ears. They should be quite close to the opposite end from the tail (obviously).
  • Using the cotton bud dipped in the red food colouring, make three red dots on the front of each mouse for eyes and a nose.
  • Cut shorter lengths of the laces to serve as whiskers. I cut the whisker lengths in half lengthwise, to create thinner whiskers, but it was quite a faff, so you might prefer not to do that.
  • Using some of the paste, stick 'whiskers' onto the face end of the mouse.
Et voila!

Friday, 10 June 2011

Lime and coconut tart


Some time back, the Kitchen Crusader shared (on her 365 project), a photo of a tart she'd enjoyed at Sayers in Perth, Australia. I liked the sound of it and started scrounging for a recipe (as you do). The only one I found, which purports to be a hack of the tart enjoyed by the Kitchen Crusader, calls for a mere 16 eggs.

That struck me as being a little on the expensive side for the likes of you and me. However, I have supplied the link to said recipe, just in case you're feeling extravagant. For the rest of us, I set out to create a cheaper alternative. And this is what I came up with. I tested it on friends and neighbours and they all declared this it deeeee-licious. I hope you enjoy it, too.

Oven temperature
180C

Ingredients
Macaroon crust
250ml caster sugar
4 eggs, separated
500ml dessicated coconut
4 fresh kaffir lime leaves, finely shredded (see note below for further info and alternatives)

Filling
500ml sugar
125g butter
Juice of 2 limes and one lemon
Grated zest of 1 lime
4 eggs

Method
Let's get that crust underway first:
  • Beat egg yolks and sugar together until thick and pale.
  • In a different bowl, beat the egg whites until they form soft peaks.
  • Fold the beaten whites into the yolks.
  • Gently fold in the coconut and lime leaves.
  • Line a springform cake pan with baking paper, including the sides (this is important, because, if you don't, the crust will stick like the dickens).
  • Spoon the mixture into the cake pan and spread it across the bottom and up the sides. If you can't get it to go up the sides, don't panic. I had one that worked and one that didn't and they tasted just the same!
  • Bake for 15-20 minutes until golden then set aside to cool.
Sprinkle with caster sugar if you like
While the crust is cooling, we can make the lime butter:
  • Combine the sugar, butter, juices and rind in a saucepan.
  • Slowly bring to the boil, stirring all the while.
  • Beat the eggs and stir into the mixture until it thickens.
Final stretch:
  •  When the crust and curd are both cool, gently spoon the curd into the crust.
  • If you're concerned about it being too sharp, sprinkle the top with caster sugar.
  • Slice and top with whipped or clotted cream to serve with coffee.
Notes about kaffir lime leaves:
Confession time - it was hugely difficult for me to reach the point where I was able to name that ingredient in my recipe, because of the connotations of 'the k-word' for a South African of my vintage. However, I have decided to get over myself in the interests of culinary delight.

Kaffir lime leaves
Kaffir limes are different from 'normal' limes. The leaves come in two parts: a leaf blade and a flattened leaf stalk which looks like a second leaf.

Dried kaffir lime leaves are widely available in supermarkets in the herbs and spices aisle. However, do not use those - the are yucky! If you are at all able to do so, get fresh ones (my husband swings by a Thai place in London and buys me a bunch for the princely sum of 99p). Whatever you don't use in this recipe can be used in all manner of other dishes - especially curries.

They are also available online. But, if you don't fancy that idea, rather substitute the grated zest of 3 limes. You'll get a closer approximation of the flavour than with the dried leaves. Scout's honour.

Wednesday, 8 June 2011

English summer pudding


This is an English tradition that was taught to me shortly after I arrived in the UK, by my friend Joan (she of the overnight salad fame here and here). I heard people talking about 'summer pudding' and assumed that it was a generic term for a dessert suitable for the summer time. Joan disabused me, even though she doesn't eat the dessert herself because she can't abide the thought of 'wet bread'.

Ingredients
750g (or just loads) of summer berries (fresh or frozen)
125ml water
White bread, slightly stale, sliced and crusts removed
Caster sugar (or alternative sweetener)

Method
  • Wash your berries (if using fresh) and bung them all in a saucepan with the water over a low heat. Smoosh them just a little to release a bit of juice, but not a lot - you still want whole berries.
  • Sweeten to taste with the sugar (or alternative).
  • Drain the fruit, but don't dispose of the juice just yet.
  • Line a pudding bowl with clingfilm - this is profanity inducing, but I find it necessary.
  • Dip a slice of bread into the juice and then use it to line the bottom of the bowl. Repeat with further slices, lining the entire bowl, leaving no gaps.
  • Spoon in the fruit. The bowl should be full when you're done.
  • Add just a little of the juice, and then cover the whole thing with more soaked bread.
  • Cover the pudding with a side plate (concave side up) and place a can of baked beans (or something) on top to weigh it down.
  • Leave in a cool place for at least 24 hours.
  • Remove the side plate, and turn the pudding out on a serving plate (see note below).
  • Serve with creme fraiche, fromage frais or (if you must) clotted cream.
Note
Turning out a dessert is easier than you might think. Place the serving plate over the the bowl and, holding it in place with both hands, flip the whole thing over. Gently and slowly remove the pudding bowl and peel away the clingfilm. If you don't use clingfilm, you may find that the pudding sticks a little and the bread tears a bit as you lift away the bowl. It will still taste just as good, so never fear, but presentation may be impacted. Not a problem if it's just the family, of course! Mine would neither notice nor care.

Monday, 6 June 2011

Themed children's parties: baskets


Today's post addresses another item from the picture above (which is a scan of an old print, so please pardon the quality). In the centre, at the back you can see a collection of little baskets. This is how I made them.

Cut the tops off
Ingredients
Ice cream cornets - the wafer kind, not the sugar kind.
Some kind of 'laces' - liquorice shoelaces are ideal, but they might not exist where you are. Those dreadfully sour lace things would probably suffice.
Thin, flat round biscuits like Marie biscuits.
Icing sugar.
Green food colouring.
Sweeties to put into your finished baskets.

Method

  1. Carefully cut the tops off the ice cream cones, so that you are left with the bit that bulges outward to hold the ice cream.
  2. Mix the icing sugar with a very little water to make a paste, and then add a few drops of green food colouring.
  3. Spread this paste over one side of each biscuit and (gently) press the cone tops into the paste, wider side up. Now you have the base of your basket sitting on a patch of grass.
  4. Cut the 'laces' into lengths of approsimately 12cm.
  5. Small pockets
  6. All around the edge of the cone are small pockets. Fill two diametrically opposite pockets with the icing paste and press one end of a lace into the paste on each cone.This gives you your handle, but don't try picking the basket up with it until the icing has dried completely (and even then it's more for effect).
  7. Pop a few sweeties (jelly babies, dolly mistures, etc) into each basket, et voila!

Wednesday, 1 June 2011

Meringue

From time to time, whether on this blog or elsewhere, you might come across a recipe that calls for egg yolks, leaving you with egg whites. Perhaps you've always thought "What a waste!" as you've tossed the egg whites in the bin, or given them to the dog to eat.

Well, don't.

Egg whites are exactly what you need to make meringues!

In fact, egg whites and caster sugar are all you need to make meringues. I kid you not.

And, once you've got your meringues (assuming you can prevent your family from eating them as is), there are so many things you can do with them!

Oven temperature
Low! About 100C

Ingredients
2 egg whites
120g caster sugar (or 60g caster and 60g icing sugar)

Method
  • Whip those egg whites until they're so stiff you can turn the bowl upside down and they stay put. No, I'm not joking. And it happens faster than you think.
  • Gradually and gently fold in the sugar (oh, alright, you can use the electric beater if you like... since it's you).
  • Place a piece of baking parchment onto a baking tray (or spray the baking tray with something non-stick-ish)
  • Place spoonfuls of the mixture onto the baking parchment. If you feel clever, and you own the necessary equipment, you can pipe the mixture onto the parchment, but it tastes the same in the end!
  • Bake for about an hour and a half. I like my meringues chewy in the middle. But if you like them crispy right through, bake them for about 3 hours.
  • Remove and cool.
Okay, so now what to do with them (other than eat them as they are, that is):
  • Spread the flat sides with whipped cream and sandwich two together.
  • Spread the flat sides with some other kind of cake icing or filling or topping or whatever and ditto.
  • Layer them in a glass bowl (or individual glass serving bowls) with strawberries, raspberries and whipped cream. If they're too big for that, crush them first. You can fling in some mini marshmallows, too if you like. Shave some chocolate over the top for fanciness.
  • Ditto the above, but with chocolate-y things such as bits of brownie, maltesers, chocolate sauce.
  • You could make one large meringue and top it with fruit.
Let your imagination run wild.

Thursday, 26 May 2011

Coffee and pecan biscuits

American readers are probably expecting something very different because of the word 'biscuit', but your understanding of the word is somewhat different from ours. To you, this recipe is probably better described as 'cookies'.

Yet another recipe cut from the pages of some or other magazine. I certainly seem to have read more magazines in my younger days than I do now. Mind you, the big selling magazines around these days are all gossip-and-celebrity, and I have no great interest in that sphere.

Oven temperature
180C

Ingredients

Biscuits
220g flour
125g butter, cubed
60ml sugar
1 egg, lightly beaten
5ml vanilla extract

Pecan cream
60g butter
60ml icing sugar, sifted
80g pecan nuts, finely chopped (I used a food processor)
10ml milk

Coffee icing
375ml icing sugar, sifted
5ml butter at room temperature
15ml instant coffee powder
15ml boiling water
20ml milk

Method
Biscuits
Cut with a biscuit cutter
  • Sift flour into a mixing bowl and rub in butter until you have a mixture resembling fine breadcrumbs.
  • Add sugar, egg and vanilla extract and mix to form a soft dough.
  • Roll out on a lightly floured surface to about 5mm thickness. I do this directly on my counter tops. And if you don't have a rolling pin, use a clean wine bottle (you can even drink the wine first, if you like!).
  • Cut out rounds using a 60mm plain biscuit cutter. If you don't have one, use a clean napkin ring or something along those lines. I used the top end of my cookie gun. You should get about 26-30 biscuits. Make sure you have an even number.
  • Place on a lightly greased baking tray and bake for 10 minutes until light golden brown.
  • Cool on wire cooling racks while you get on with other things.
Pecan cream
  • Cream butter until light and fluffy.
  • Add icing sugar and beat well.
  • Add chopped pecan nuts and milk and mix well.
  • When the biscuits are cool (and not a moment before, or it won't work), spread this over half the biscuits and then pop another biscuit on top to make a sandwich. You can afford to be pretty lavish with this, there is a fair amount of it.
  • Refrigerate for 30 minutes while you get on with the coffee icing.
Coffee icing
  • Place icing sugar, butter and milk into the top of a double boiler over medium heat. Don't fret, I don't have one either, so I balance a smallish Pyrex dish on top of a saucepan. The handles of the Pyrex dish are wide enough so that it doesn't fall into the saucepan. There should be enough boiling water in the saucepan so that the bottom of the Pyrex dish is just in the water, but not so much that the water slops over the edge of the Pyrex into the icing sugar.
  • Dissolve the coffee in the 15ml of boiling water and add to the mixture.
  • Stir the mixture over simmering water until it is completely smooth.
  • Spread over the top of each biscuit. Once again, you can afford to be generous, here. This icing will set quite quickly, so I work directly out of the 'double boiler' as I ice the biscuits.
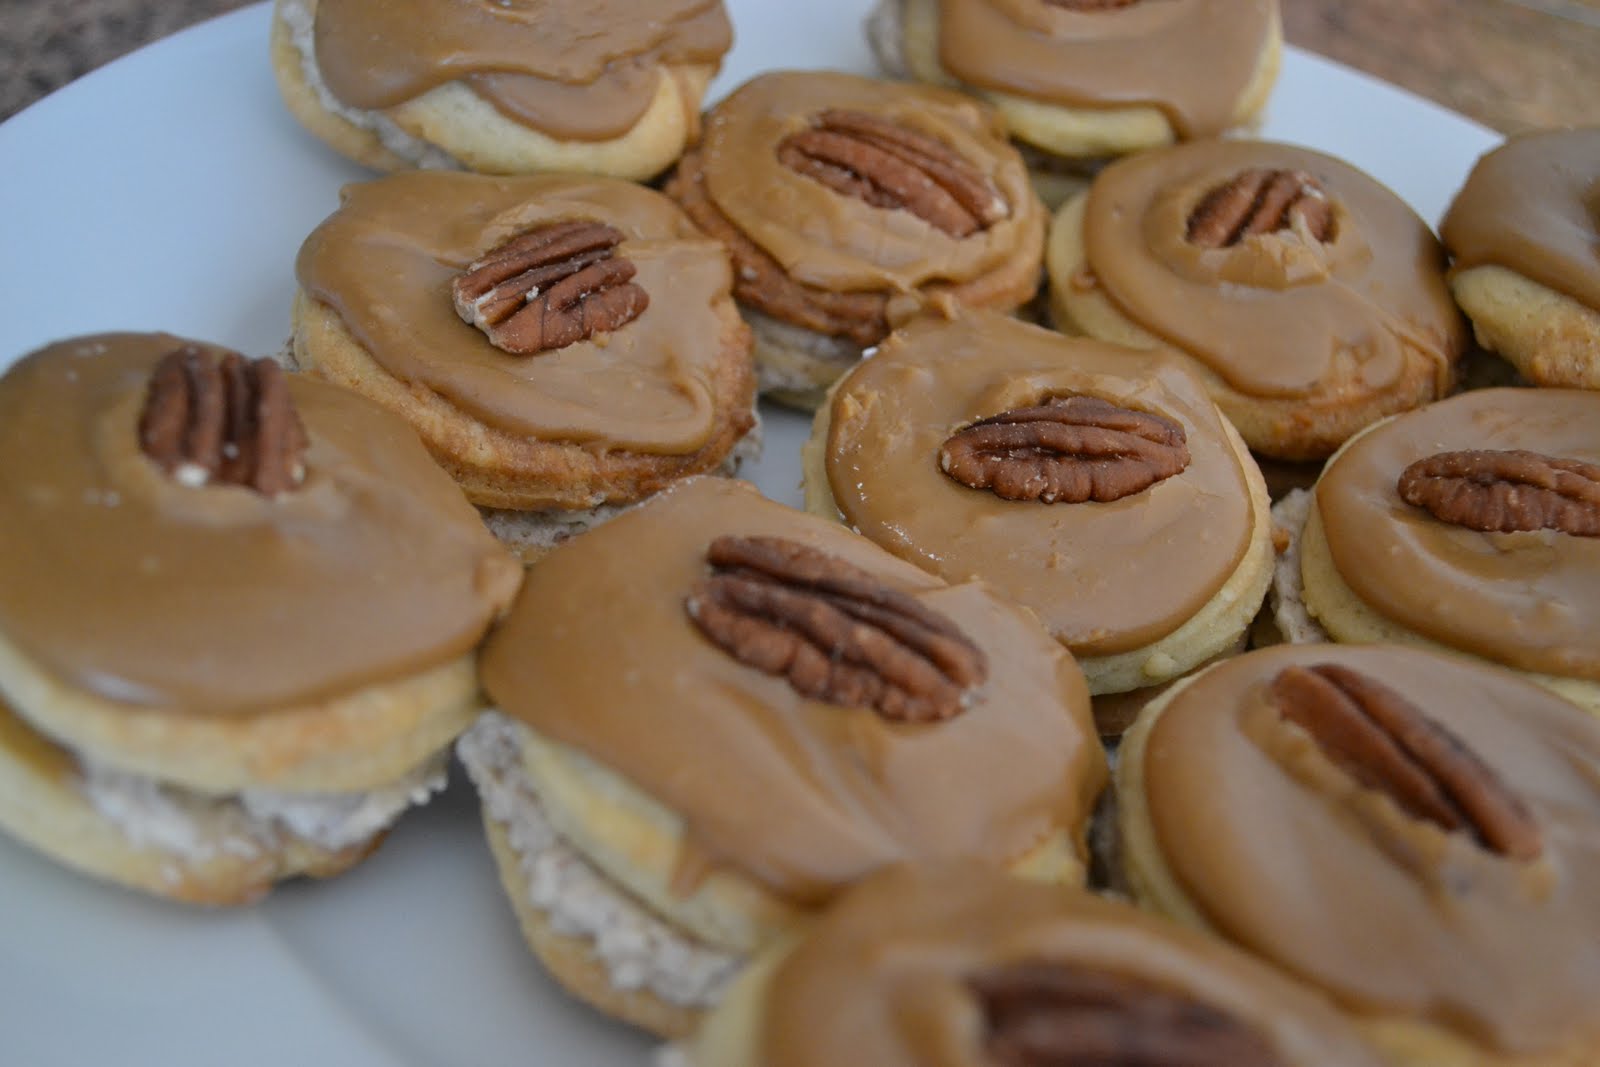
  • Decorate each one with half a pecan, or a glace cherry or whatever takes your fancy. This is of course an entirely optional step.
Yummilicious!

Thursday, 19 May 2011

Fudge

Just in time for the weekend, I thought I'd share a recipe for fudge. I have had many recipes for fudge over the years, but this one is my favourite. It comes from my sister in law. It is thoroughly decadent, but then you weren't expecting a health food recipe when once you'd seen the title, were you?

For years, I had absolutely no success with fudge or jam or any of those things that involve boiling sugar mixtures for ages on end. Then I bought myself a sugar thermometer and everything changed. I highly recommend them!

Ingredients
250g butter
250ml milk
25ml golden syrup (Americans can try golden syrup or corn syrup)
1kg sugar
397g tin condensed milk
10ml vanilla extract

Method
  • It's best to use a heavy-bottomed saucepan for this recipe. Melt the butter, then add the milk, syrup and sugar.
  • Bring to the boil over a medium heat, stirring frequently.
  • Boil for 15 minutes, still stirring frequently.
  • Add the condensed milk and bring back to the boil, stirring continuously.
  • Boil until soft ball stage is reached - roughly 115C. Ann reckons this takes 12 minutes. I find it takes much longer than that. Perhaps she uses a higher heat than I do.
  • Remove from the heat and add the vanilla. Beat well with an electric beater.
  • Pour out into a shallow dish or baking tray.
  • Leave to stand until cool. When the fudge has begun to set, but is still warm, score it deeply so that you can cut it into squares later without it breaking (if that matters).
If the fudge doesn't set, this is probably because you didn't bring it to a high enough temperature and you know what? You can either heat it up and use it as a sauce for ice-cream, or you can bung it back into the saucepan and bring it back up to the right temperature. I've done both in my time. The great thing about cooking for your family is that they are usually more than happy to devour your 'flops' without a murmur...as long as said flops are sweet treats, that is!

Monday, 16 May 2011

Themed children's parties: racing cars

The next in the series of themed children's party eats can be (just about) seen in the foreground of the picture above, on the right.

Ingredients
Finger biscuits
Icing sugar (about half a cup should do it)
Round sweets such as dolly mixtures, liquorice allsorts or lifesavers
Jelly babies

Method
  • Mix up the icing sugar with just enough water to make a paste.
  • The finger biscuits are the body of your racing cars. Using the icing sugar paste, stick a round sweet to the front and back of each side of the biscuit. Don't get clever and try to position the tyres (tires) so that the body is raised, okay? We're going for an idea, here. So keep the biscuit flat on the surface or you will discover that you know lots of very rude words.
  • Chop each jelly baby in half across its waist, or maybe a little higher. Eat the bottom halves. Stick the top halves onto the finger biscuits about halfway along, to be the driver.
  • Et voila! Racing car eats for your party.

Friday, 13 May 2011

Hummingbird cake


Note: No actual hummingbirds were harmed during the making of this cake.

Blogger's been down much of the day, so this recipe is a little late, but hopefully it will prove to have been worth the wait. The first time I tasted this cake was in a little independent coffee shop in Durbanville in the Western Cape. The owner of the coffee shop had a friend who made them for her. She refused to share the recipe with me, but told me that it was an Australian cake.

In the intervening years, I have tracked down many recipes for this cake, and they all seem to indicate that it originates in the southern United States of America. None of them explain how it came by the name, though. Perhaps someone can tell me the real story.

Enough of that, now. Let's get baking, shall we?

Oven temperature
180C

Ingredients
Cake:
750ml plain flour
500ml sugar
2.5ml salt
5ml baking powder
5ml ground cinnamon
3 eggs, beaten
175ml vegetable oil
2.5ml vanilla
225g tin of crushed pineapple in juice
250ml chopped pecans
3 medium sized bananas, mashed

Icing:
125g butter at room temperature
250g cream cheese
500g icing sugar
2.5ml vanilla extract
2.5ml lemon juice
'Some' chopped pecans

Method
  • Sift together the flour, salt, baking powder and cinnamon, then stir in the sugar.
  • Fold in the beaten eggs, oil, vanilla, pineapple (complete with juice), nuts and bananas.
  • Blend well (by hand, though - not in a blender!) and divide into three 20cm baking pans.
  • Bake for 25 minutes and then cool on racks before icing.
Now let's get weaving on that icing, shall we, because it's deeeelish!
  • Beat together the cheese and butter.
  • Gradually add the icing sugar a little at a time, mixing well with each addition.
  • Finally, add the lemon juice and vanilla and stir well.
  • Apply to all three cake layers. I suggest dividing it up evenly first.
  • Stack the layers and then garnish with a few pecans.
Be warned, this cake was so tall that it left icing on the top of my tallest cake tin! What a problem to have.

Monday, 9 May 2011

Themed children's parties: pig faces

That wasn't brilliant timing, was it? I promised you a Monday series for children's parties right before two sequential bank holiday Mondays. Doh! Well, I'm back on track, now.

Today's eats are useful for nursery rhyme parties ("This little piggy..."), fairy tale parties (Three Little Pigs), farmyard themed parties, Peppa Pig parties, and (of course) parties with no theme at all. You can see the pigs on the right had side of the picture above. Once again scanned from an old photo, so not the greatest quality, I grant you. Fret not, I will share with you how to make each of the things in that photo... except the crisps.

Ingredients:
Flat round biscuits (Marie biscuits or thin rich tea biscuits)
Pink marshmallows (next week, I'll show you what to do with the white ones)
Pink icing (frosting) already made up
Red food colouring and an cotton bud (Q tip) to apply it... clean, of course!
Small round sweets like Smarties, Jelly Tots or some such.

Method:
  • Spread each biscuit with pink icing.
  • Chop the marshmallows in half (horizontally, as in, to make a shorter cylinder) and press one half into the icing in the centre of the biscuit. This is your piggy's nose. I used scissors for this.
  • Using the cotton bud and the red food dye, make two red dots on the top of the marshmallow for nostrils.
  • Press two little sweeties into the icing above the nose for eyes. Remember that a pig's eyes are quite low and wide set. If you place them high and close together, you will get a more bear-like face.
  • Slice a marshmallow into roughly 4mm circles. Cut each circle in half. These are your ears. Press them into the icing near the top of the head (they should stick out over the edge) to make ears, and short of squeeze them into a longer, narrower shape (pig's don't have round ears).
  • And that's it. Honest. You don't need to bother with a mouth.

Thursday, 5 May 2011

Fruit crumble with an oh-so-tasty difference

Fruit crumbles are popular, easy dessert options, and you can use just about any fruit: fresh, canned or frozen that you have to hand. But I recently learned a wonderful trick with crumble that I would like to share with you. This recipe is once again based on one drawn from my new favourite 200 veggie feasts. The 'trick' can be applied to pretty much any crumble recipe, but I'll give it a context, shall I?

Oven temperature
180C

Ingredients
500g plums, halved and stoned
1 large pear, peeled, cored and thinly sliced
100g caster sugar
125g plain flour
50g butter, diced
125g marzipan, coarsely grated (this is the secret ingredient, ladies and gentlemen)

Method
  • Arrange the fruit in a pie dish and sprinkle with half the sugar.
  • With your fingertips, rub the rest of the sugar, flour and butter together, until you get a consistency like breadcrumbs (you can also use a food processor for this).
  • Gently stir in the marzipan.
  • Spoon this mixture over the fruit.
  • Bake for 35-40 minutes until golden brown. If it starts to brown too quickly, cover it with foil for a while. Otherwise you'll end up with burnt crumble over still-raw fruit.
  • Serve hot with cream, custard or ice cream.